Air Fryer Yogurt Bagels
Highlighted under: Simple & Tasty
I love making Air Fryer Yogurt Bagels because they offer a delicious, easy way to enjoy a classic breakfast staple. With just two main ingredients, they come together in no time, perfect for busy mornings or a weekend treat. The texture is surprisingly delightful, and the flavor is simply amazing. Plus, using the air fryer means I'm not heating up the oven, which is a win in my book! Trust me, once you try these, you'll want to make them all the time.
When I first tried making these bagels, I was shocked by how simple the process was and how amazing the outcome turned out to be. I decided to play around with the flavors by adding different spices and toppings, which transformed an ordinary breakfast into a gourmet experience. The secret lies in the air fryer and the combination of yogurt and self-rising flour that gives a perfect rise and texture.
After several attempts, I found that letting the dough rest for a few minutes before shaping made a significant difference. This small tip ensured a lighter bagel that boasts a crispy outside and a wonderfully chewy inside. My family couldn't get enough of them, and I’m sure yours will love them, too!
Why You Will Love These Bagels
- Quick and easy to make with just two ingredients
- Perfectly crispy on the outside and chewy on the inside
- Customizable with various toppings and flavors
- Healthier option without compromising on taste
Perfecting Your Bagel Dough
Achieving the right consistency in your bagel dough is crucial for the best texture. The combination of Greek yogurt and self-rising flour results in a dough that is moist yet firm. If your dough feels too sticky after combining, you can add a little extra flour, a tablespoon at a time, until it comes together smoothly. Alternatively, if the dough is too dry and crumbly, a small splash of water or additional yogurt can help achieve the ideal pliability for shaping.
When kneading, aim for a balance between not overworking the dough and ensuring it's well blended. Knead gently for 1-2 minutes, just until smooth and elastic. Over-kneading can make your bagels tough, while under-kneading might result in uneven texture. The dough should be slightly tacky but should not stick excessively to your hands or the surface.
Customizing Your Bagel Experience
Once you’ve mastered the basic bagel recipe, feel free to experiment with different flavors in the dough. You can fold in herbs like chopped chives or garlic powder for a savory twist, or mix in some cinnamon and sugar for a sweet version. The key is to maintain the balance of your two main ingredients to ensure proper rising and texture. Just remember not to exceed 1/4 cup of additional ingredients to keep the dough's integrity.
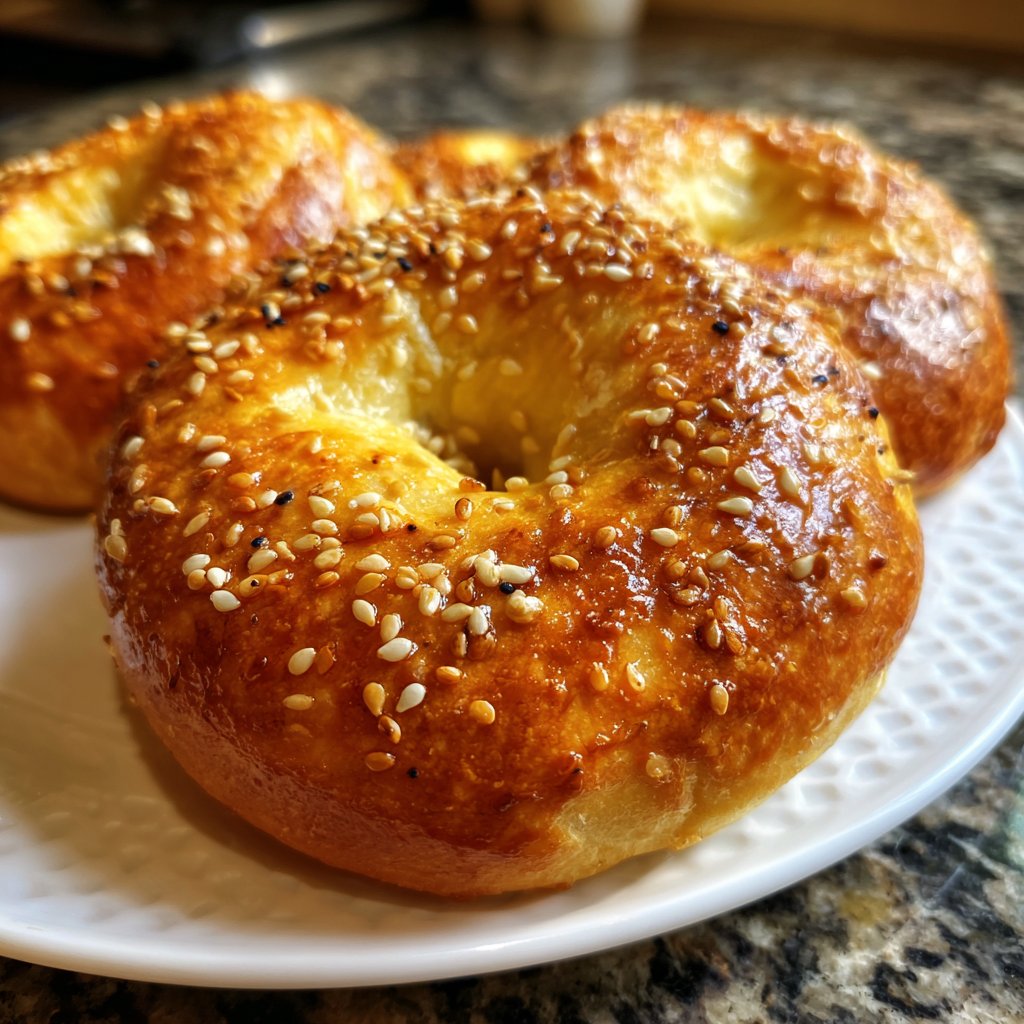
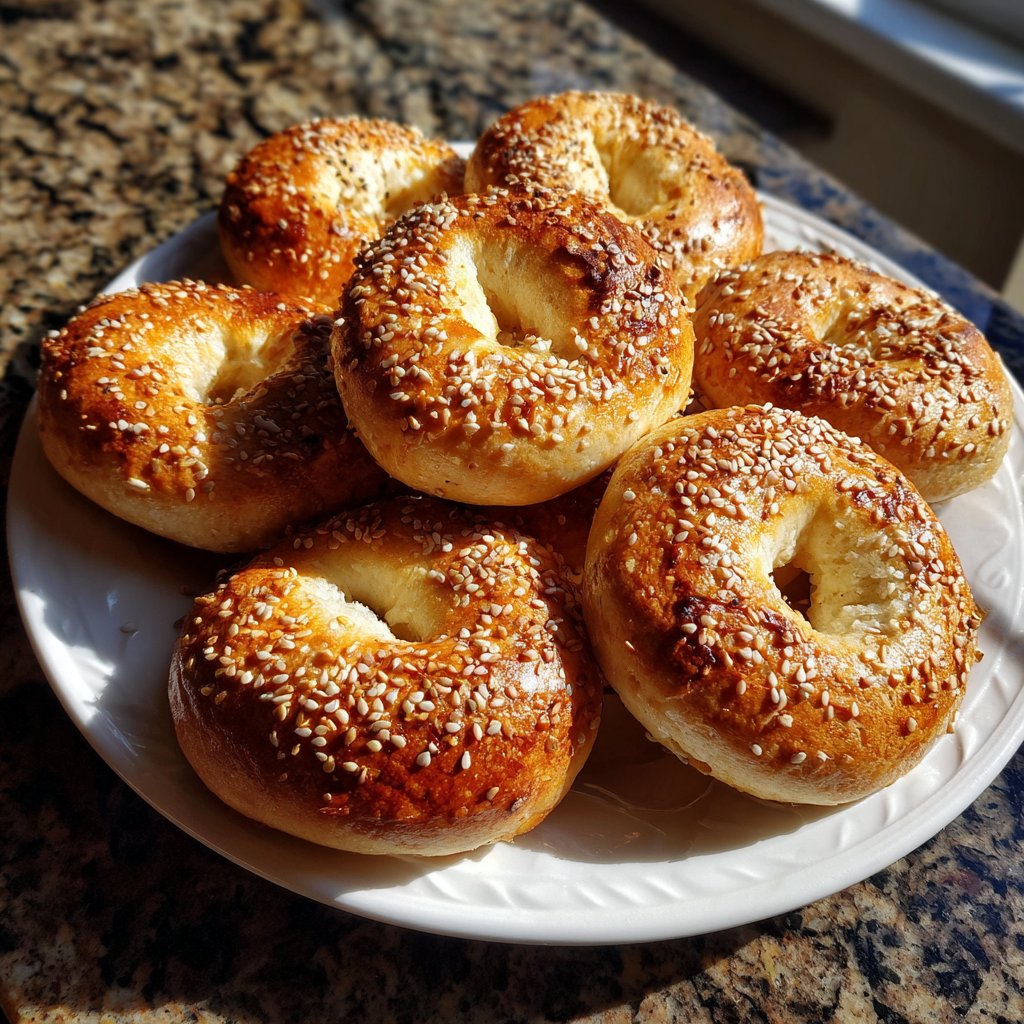
For toppings, the options are virtually endless! Classic choices like sesame seeds, poppy seeds, and everything bagel seasoning bring a delightful flavor contrast to the bagels. I recommend sprinkling them on immediately after flipping the bagels halfway through cooking. This timing helps the toppings adhere better while allowing them to toast slightly in the air fryer for extra crunch.
Ingredients
Ingredients
- 1 cup plain Greek yogurt
- 1 cup self-rising flour
- Optional: Toppings like sesame seeds or everything bagel seasoning
Instructions
Prepare the Dough
In a mixing bowl, combine the Greek yogurt and self-rising flour. Stir until well combined and a dough begins to form.
Knead the Dough
Transfer the dough to a floured surface and knead gently for about 1-2 minutes until smooth and elastic.
Shape Bagels
Divide the dough into 4 equal pieces. Roll each piece into a ball, then use your finger to create a hole in the center, forming a bagel shape.
Preheat the Air Fryer
Preheat your air fryer to 350°F (175°C).
Cook the Bagels
Place the bagels in the air fryer basket, making sure they are not touching. Cook for 10 minutes, flipping halfway through.
Add Toppings (Optional)
If desired, sprinkle your favorite toppings on the bagels after flipping, and allow them to cook an additional 5 minutes.
Pro Tips
- Experiment with different flavors by adding herbs or spices to the dough, or try mixing in cheese for a savory version!
Storing and Serving Your Bagels
Air Fryer Yogurt Bagels are best enjoyed fresh, but you can store any leftovers in an airtight container at room temperature for up to two days. If you want to enjoy them later, they freeze beautifully! Just place the cooled bagels in a freezer-safe bag, separating layers with parchment paper to prevent sticking. They can be frozen for up to three months.
To reheat, simply pop them in the air fryer for a few minutes at 300°F (150°C) or slice them and toast them. This will revive their crispy exterior while keeping the inside chewy. I love to slice them open and add cream cheese, smoked salmon, or avocado for a quick and delicious breakfast option.
Troubleshooting Common Issues
If your bagels are coming out too dense, it might be due to either too much flour or not enough yogurt. The balance is key for achieving that ideal chewy texture. If you find your bagels lack flavor, consider incorporating some spices or herbs directly into the dough for an enhanced flavor profile.
Another common issue is uneven cooking. Ensure you don’t overcrowd the air fryer basket; leaving space between each bagel allows the hot air to circulate freely, resulting in a more consistent cook. Flip them halfway through to promote even browning and a delightful texture on both sides.
Questions About Recipes
→ Can I use non-Greek yogurt?
Yes, but Greek yogurt gives the best texture and flavor for these bagels.
→ What if I don't have self-rising flour?
You can make your own by combining all-purpose flour with baking powder and salt.
→ How long can I store these bagels?
You can store them in an airtight container at room temperature for up to 2 days, or refrigerate them for longer.
→ Can I freeze the bagels?
Absolutely! Just ensure they are well-wrapped before freezing. Thaw them at room temperature before reheating.
Air Fryer Yogurt Bagels
What You'll Need
Ingredients
- 1 cup plain Greek yogurt
- 1 cup self-rising flour
- Optional: Toppings like sesame seeds or everything bagel seasoning
How-To Steps
In a mixing bowl, combine the Greek yogurt and self-rising flour. Stir until well combined and a dough begins to form.
Transfer the dough to a floured surface and knead gently for about 1-2 minutes until smooth and elastic.
Divide the dough into 4 equal pieces. Roll each piece into a ball, then use your finger to create a hole in the center, forming a bagel shape.
Preheat your air fryer to 350°F (175°C).
Place the bagels in the air fryer basket, making sure they are not touching. Cook for 10 minutes, flipping halfway through.
If desired, sprinkle your favorite toppings on the bagels after flipping, and allow them to cook an additional 5 minutes.
Extra Tips
- Experiment with different flavors by adding herbs or spices to the dough, or try mixing in cheese for a savory version!
Nutritional Breakdown (Per Serving)
- Calories: 180 kcal
- Total Fat: 3g
- Saturated Fat: 1g
- Cholesterol: 10mg
- Sodium: 75mg
- Total Carbohydrates: 32g
- Dietary Fiber: 1g
- Sugars: 1g
- Protein: 6g